 "Forge Crown Victor!" (metallicaman0258)
09/16/2016 at 22:00 • Filed to: None
 1
1
 0
0|
"Forge Crown Victor!" (metallicaman0258)
09/16/2016 at 22:00 • Filed to: None | 1
| 0 |
!!!error: Indecipherable SUB-paragraph formatting!!!
For the front page! LOOKIT ME IM MR. MEESEEKS!
Its been a long, long, time and I give my deepest regrets. 3 Long months and a fortnight have passed, work has been done, telephonic apparatus have been lost, pictures missing, fingers cut, hands bruised, tools broken, tools created and for what? You have waited, wanting,
starving
for something to read about the Audi 5K and the progress that has been made. Today I answer that beckon, that hunger for knowledge. TODAY IS THE DAY YOU LEARN THE FATE OF AN ANTIQUE GERMAN CAR!!
Actually, this is coming in at least 2 parts and probably all tonight so stay tuned kiddies.
Last time on this series, I left you with a bare cylinder head casting that had just been hot tanked and had broken studs removed from their home for the last 30 or so years.
It is time for assembly!
First things first, I own a valve spring compressor in the C-clamp style that is traditionally used for OHV (overhead valve, look it up peasant) arrangements seen on most V8 engines made until the early 2000's (unless you’re a GM guy then lucky you). This tool was not sufficient for the task at hand because in the OHC (overhead cam, pleb) arrangement, at least in the one that’s common in 2V VW/Audi engines, there is a tappet “bucket” that rests atop the valve stem to create a bearing surface sufficient enough to allow the cam lobe to actuate the valve that sits in a bore in the head similar to a small piston. This bore is what limits the compressor and does not allow it to perform its function properly.
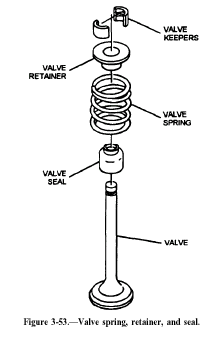
“Forge, how did you remove the valves then?” Simple. A 3/4" socket for a 1/2" drive provided sufficient reach to relieve the keepers from the valve. I simply used a telescopic magnet via the drive orifice to remove the keepers. Relieve tension on the retainer washer and viola! Free valves!
Installing them was a bit more of a challenge being as I did not have the proper OHC adapter for this particular application. So I did as any other Hillbilly Engineer would. I went to the hardware store.
First thing I tried was to get a deep well spark plug socket and cut a window in it to try to use to install the keepers. The short story is that didn’t work because of the way it was designed. So I got even more creative.
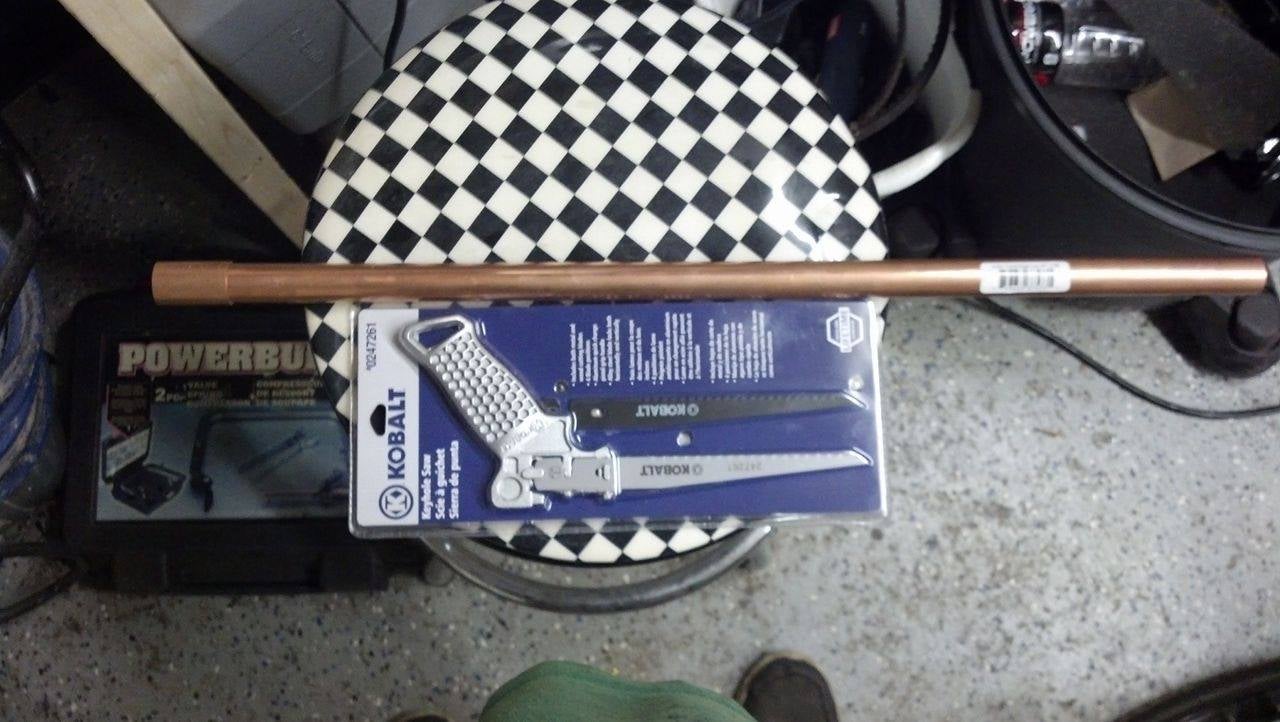
Cahpah is da whey when yas needin solids yets flexesablity.
Starting with a length of copper plumbing and a union, I cut a short section off.
Union, short and larger! Non-Union, Tall and Skinny...
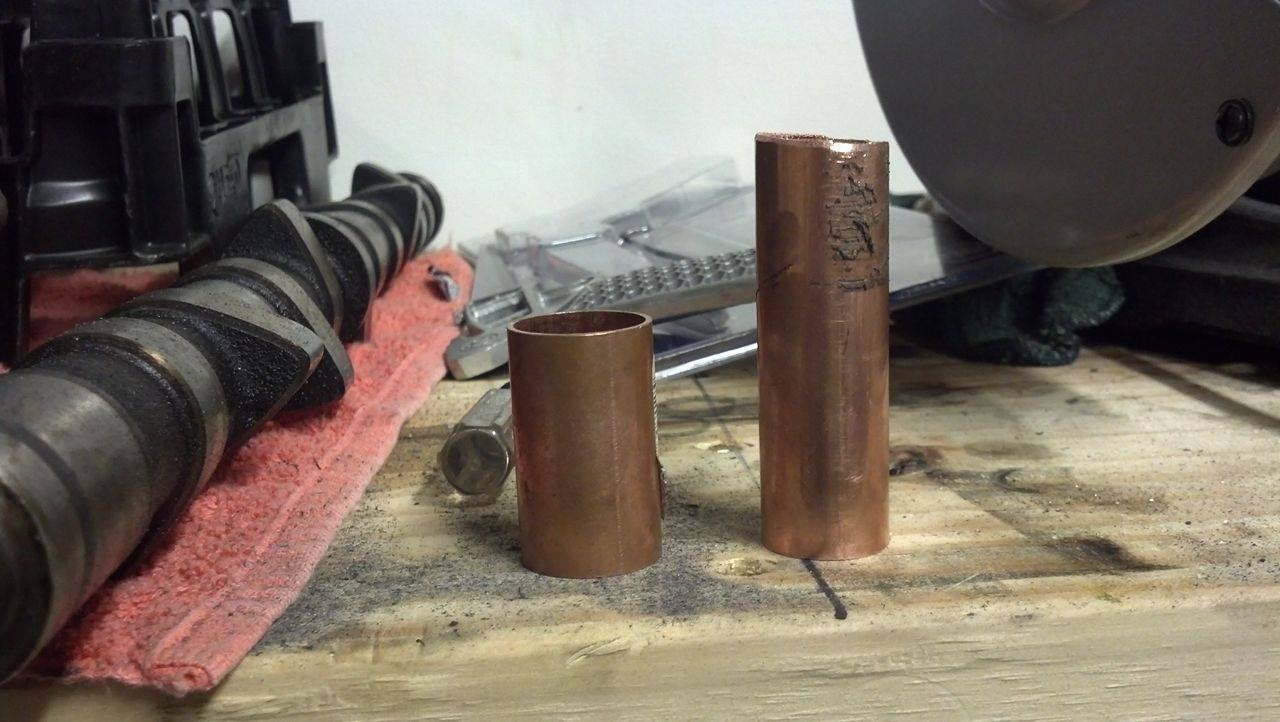
Then using a bench grinder (next time I will use a cutoff wheel, its a crap of a lot faster) I created a window in the pipe large enough for my pliers to fit through!
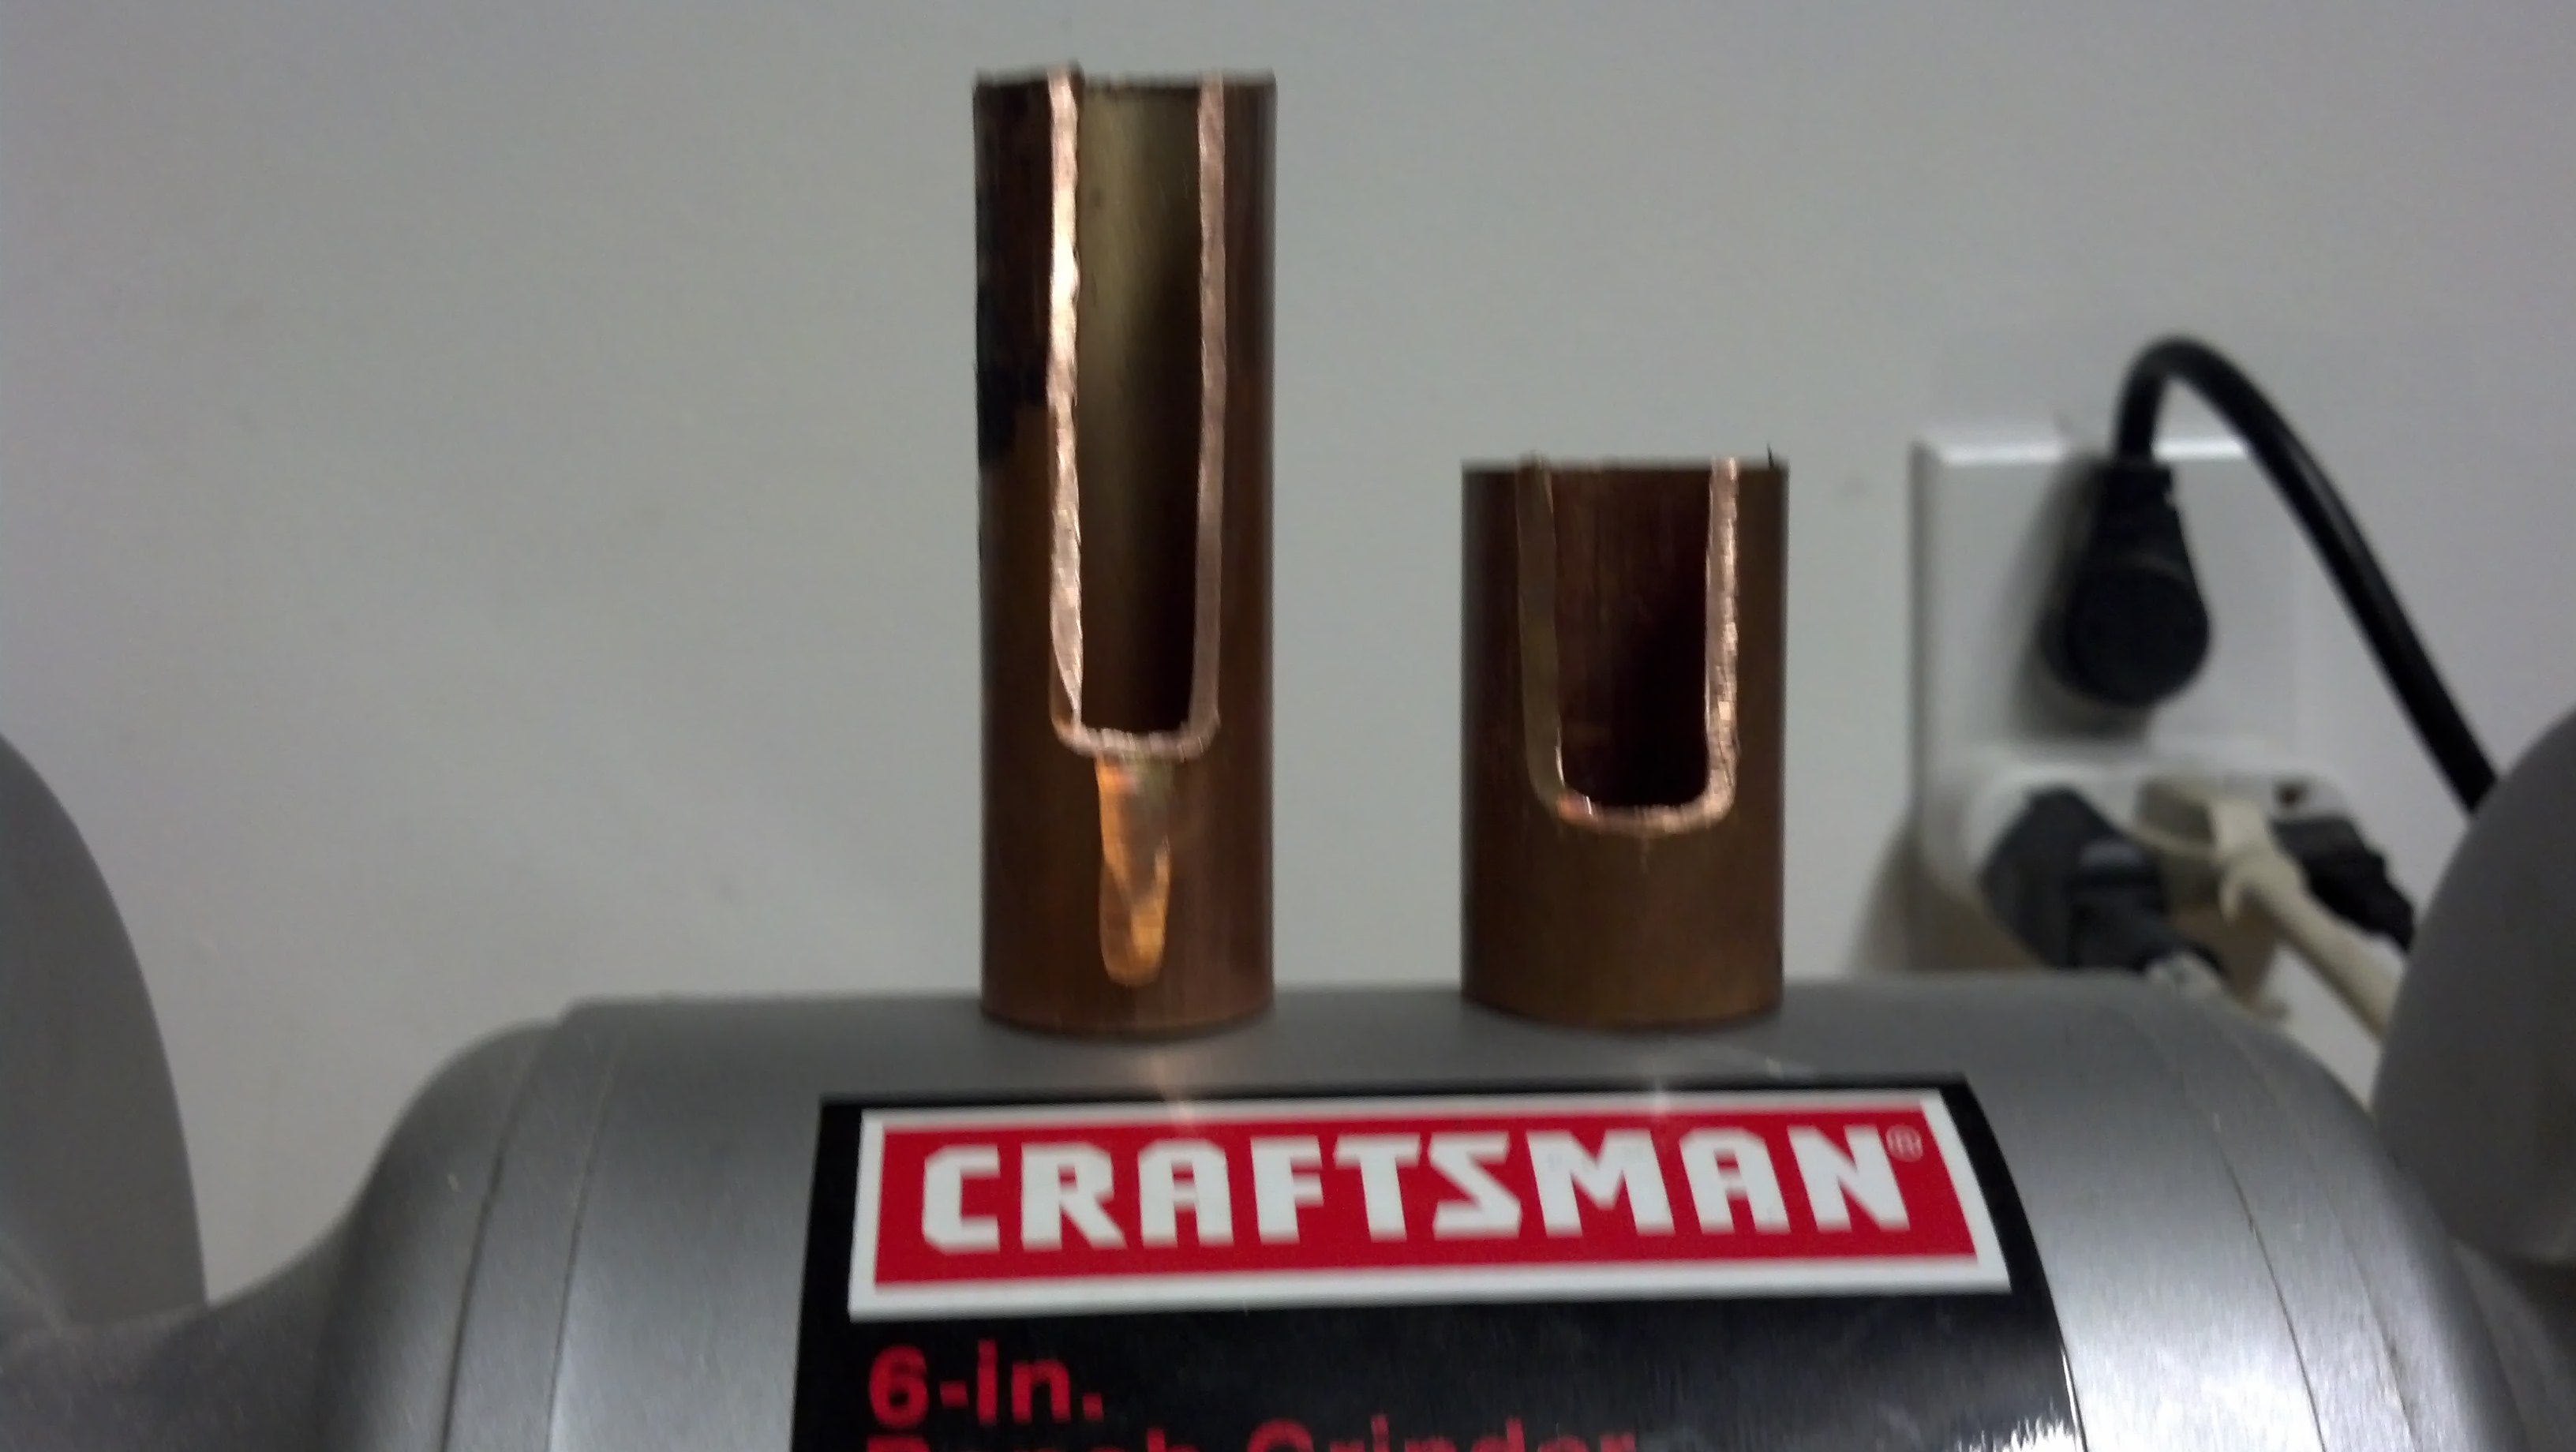
Please join these 2...
Put ‘em together and what do you get? OHC adapter for valve spring compressor!
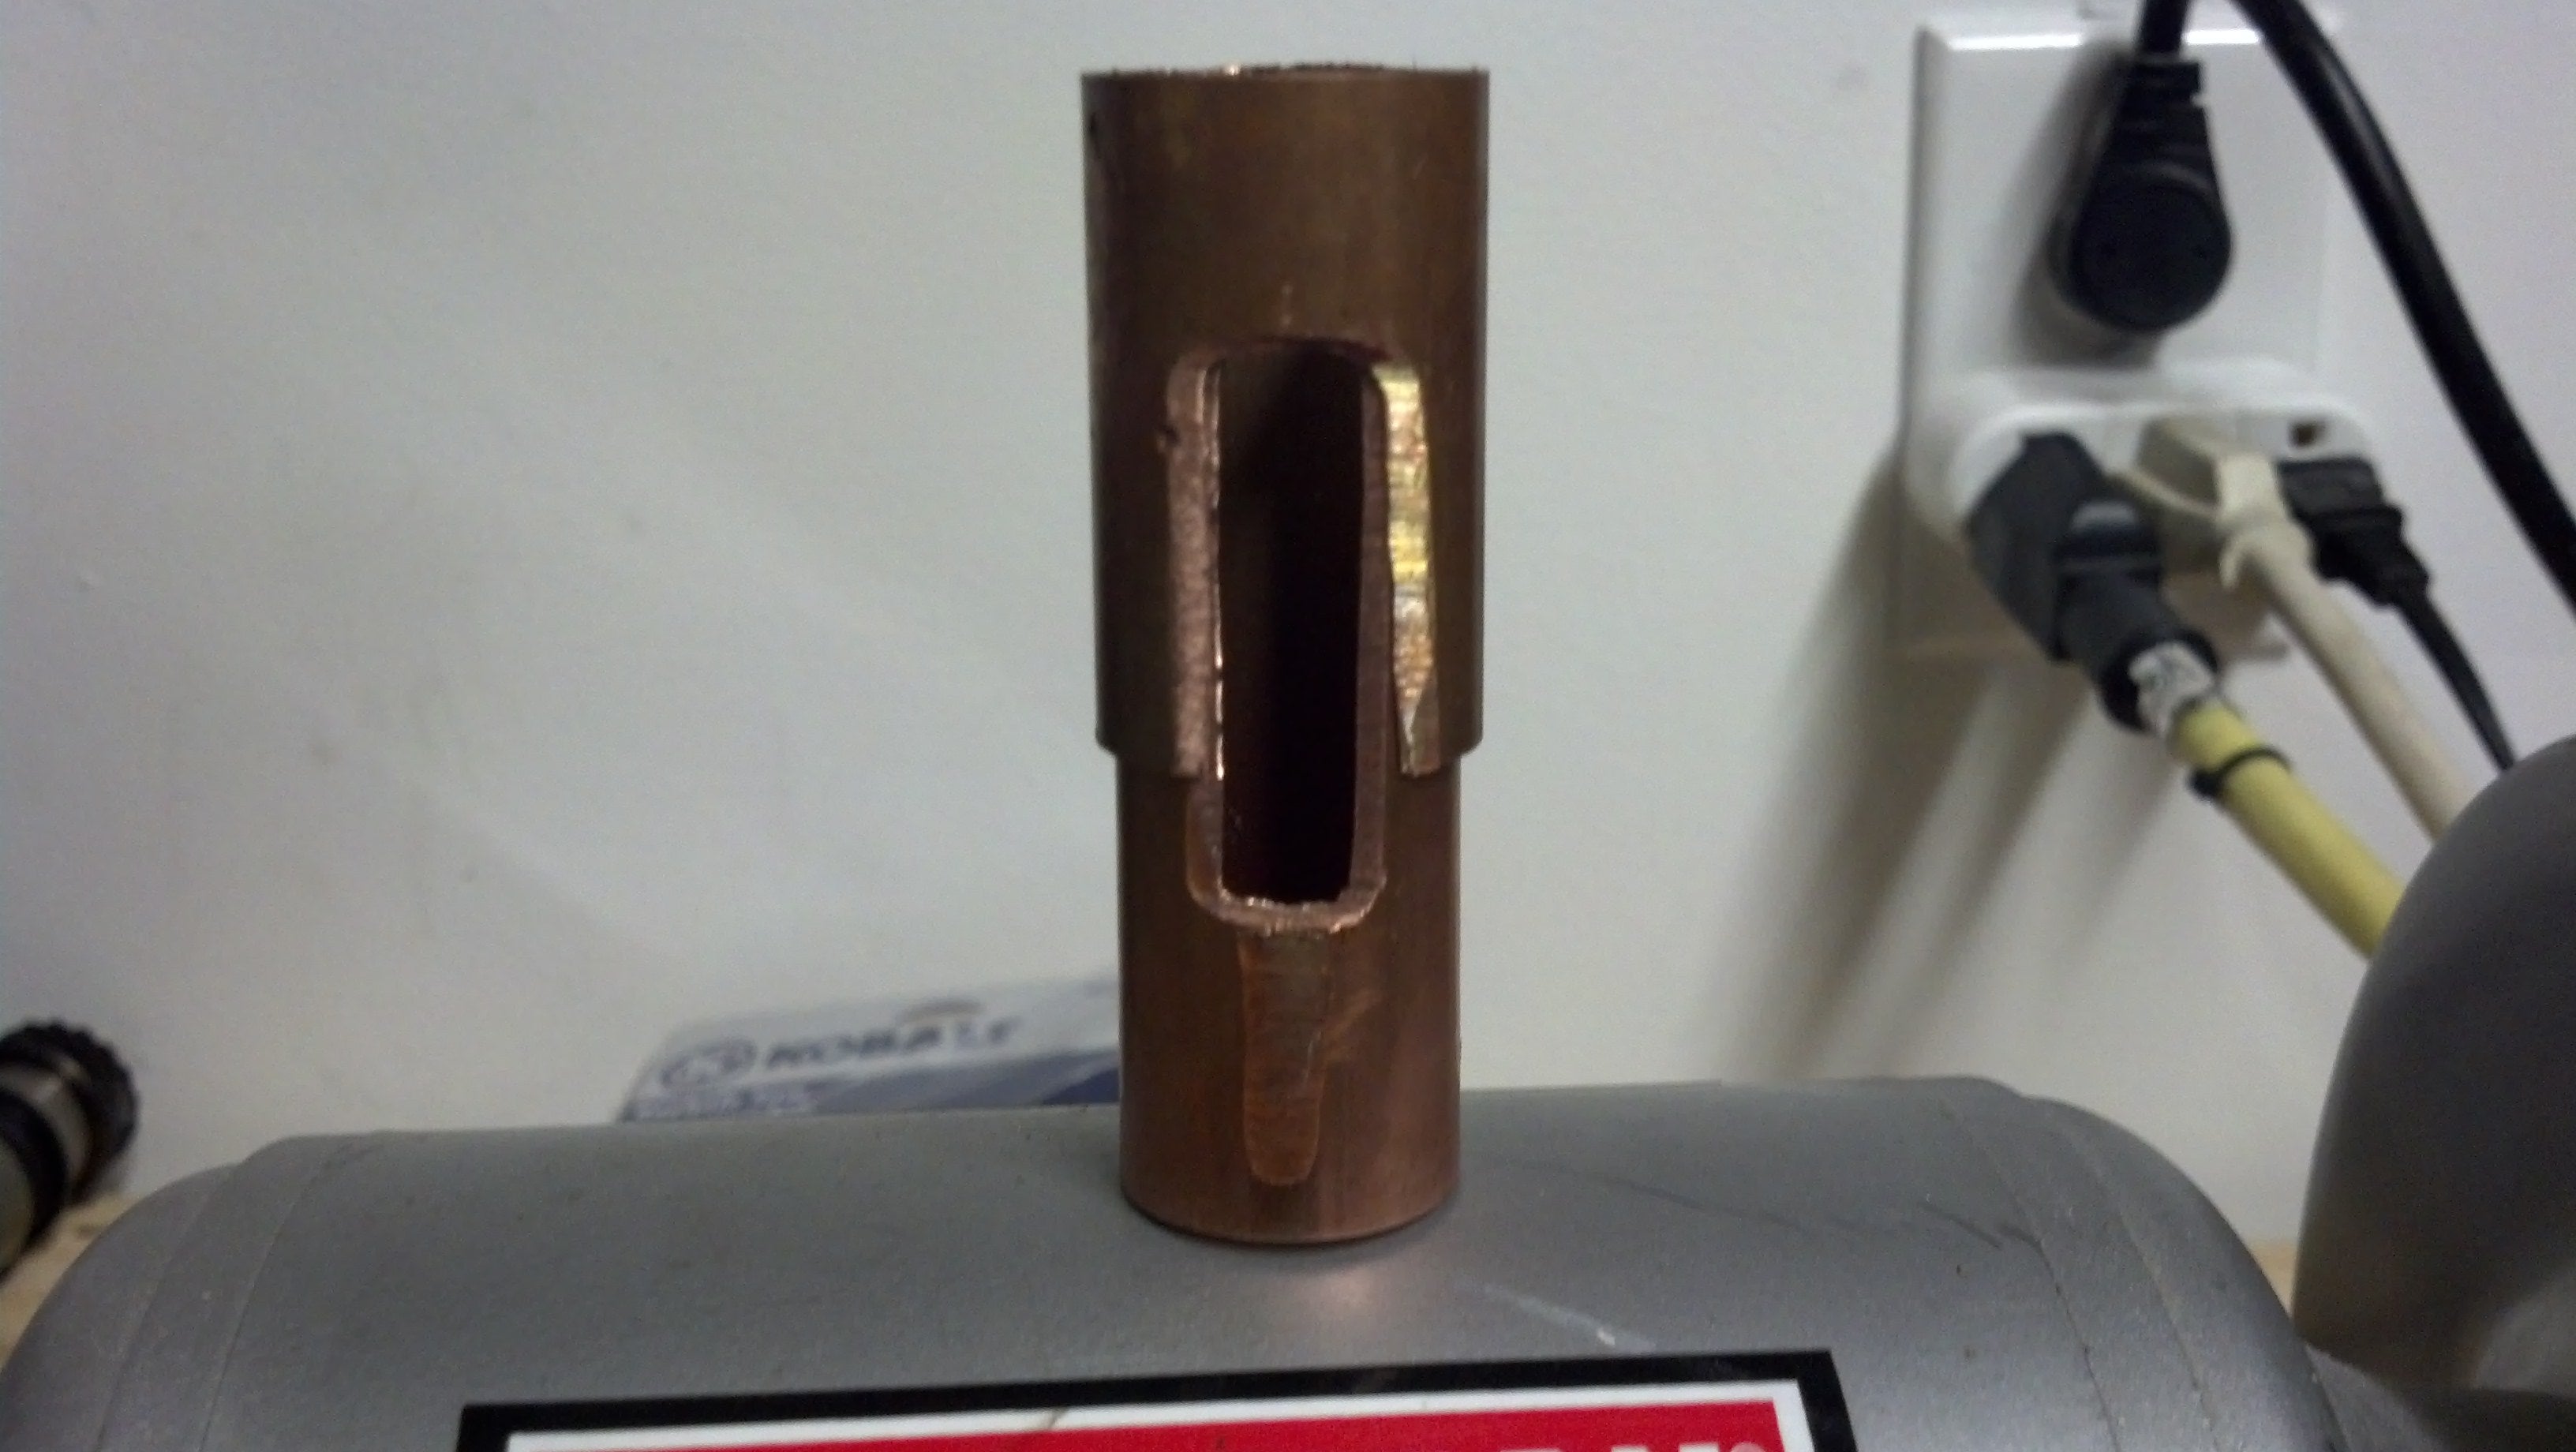
...in a holy union
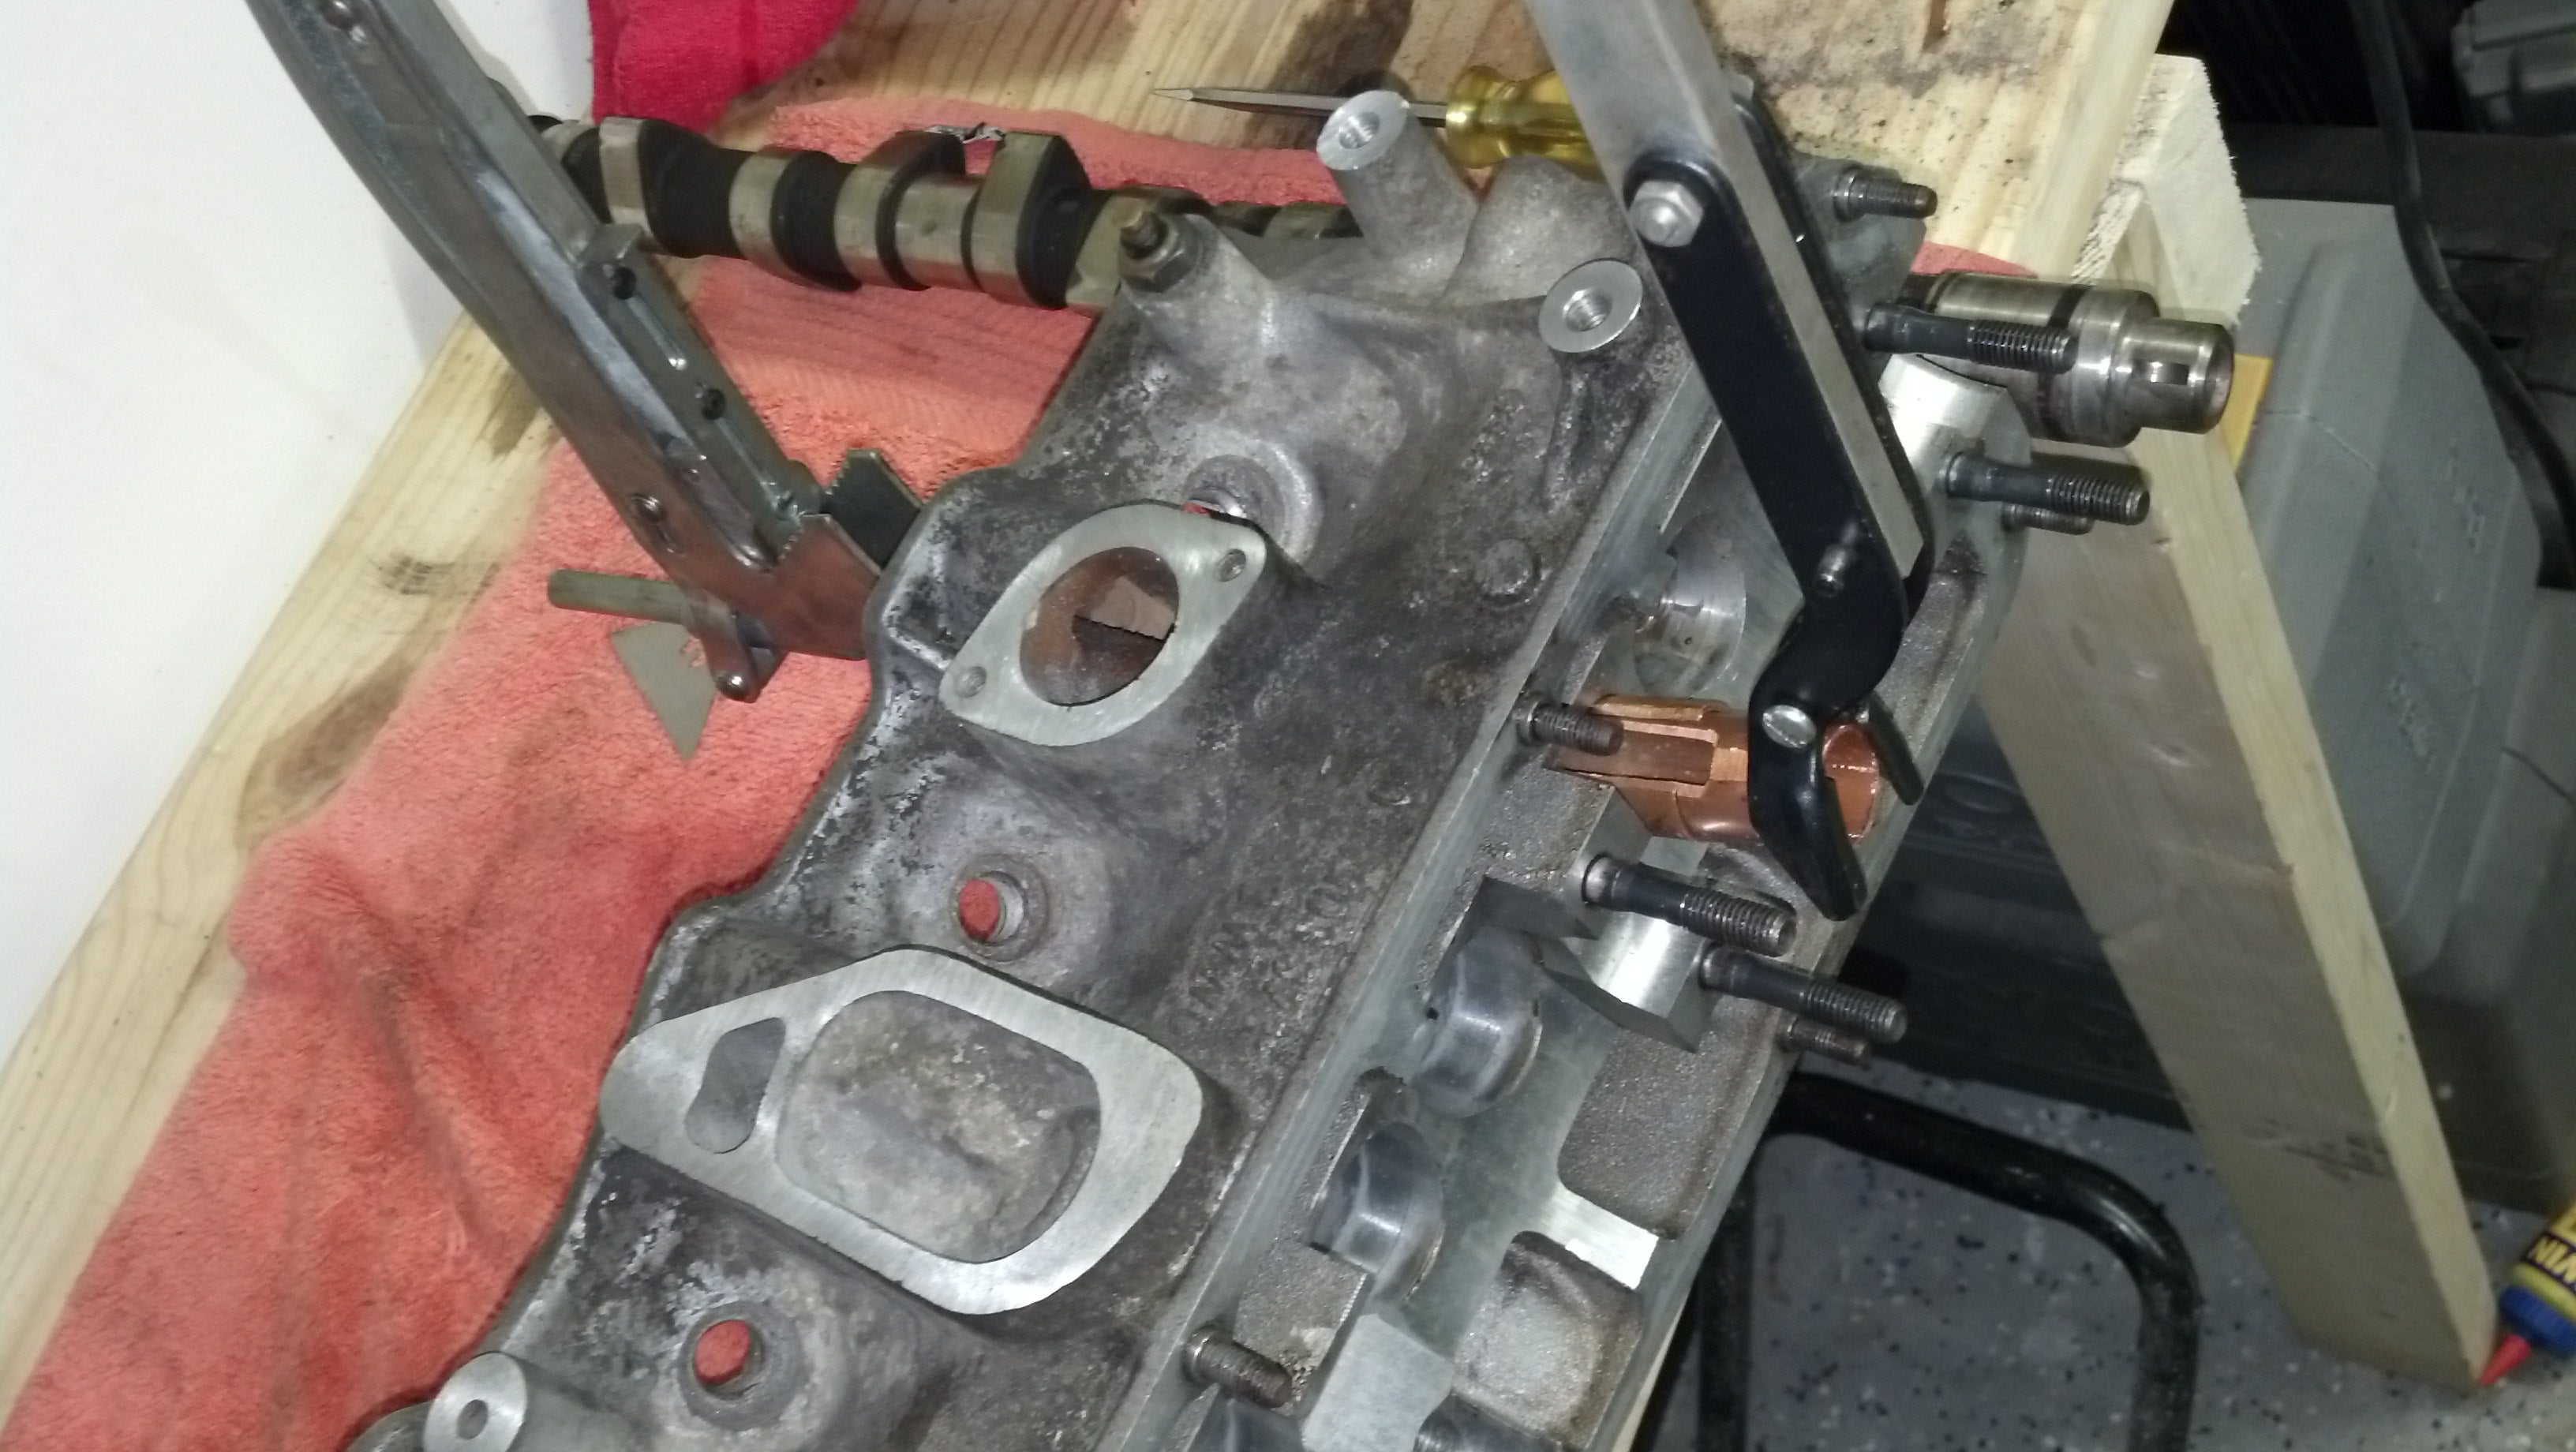
DISCLAIMER: The procedure outlined in the next few photos should never be attempted. When using any type of spring compressor the forces necessary to compress the spring are great. When doing this procedure, use the proper equipment or have a qualified shop do the work for you. I’m poor and creative, this is no excuse. This procedure should NEVER be attempted under ANY circumstances.
So I squared up the pipe end to the spring washer, spring side of the compressor the the pipe, and valve side of the compressor on the valve.
Hi kids! do you like violence? wanna see me pull lots shrapnel out of each one of my eyelids?
As you can see, my idea worked!
Plumbing used for engine assembly? Who knew?
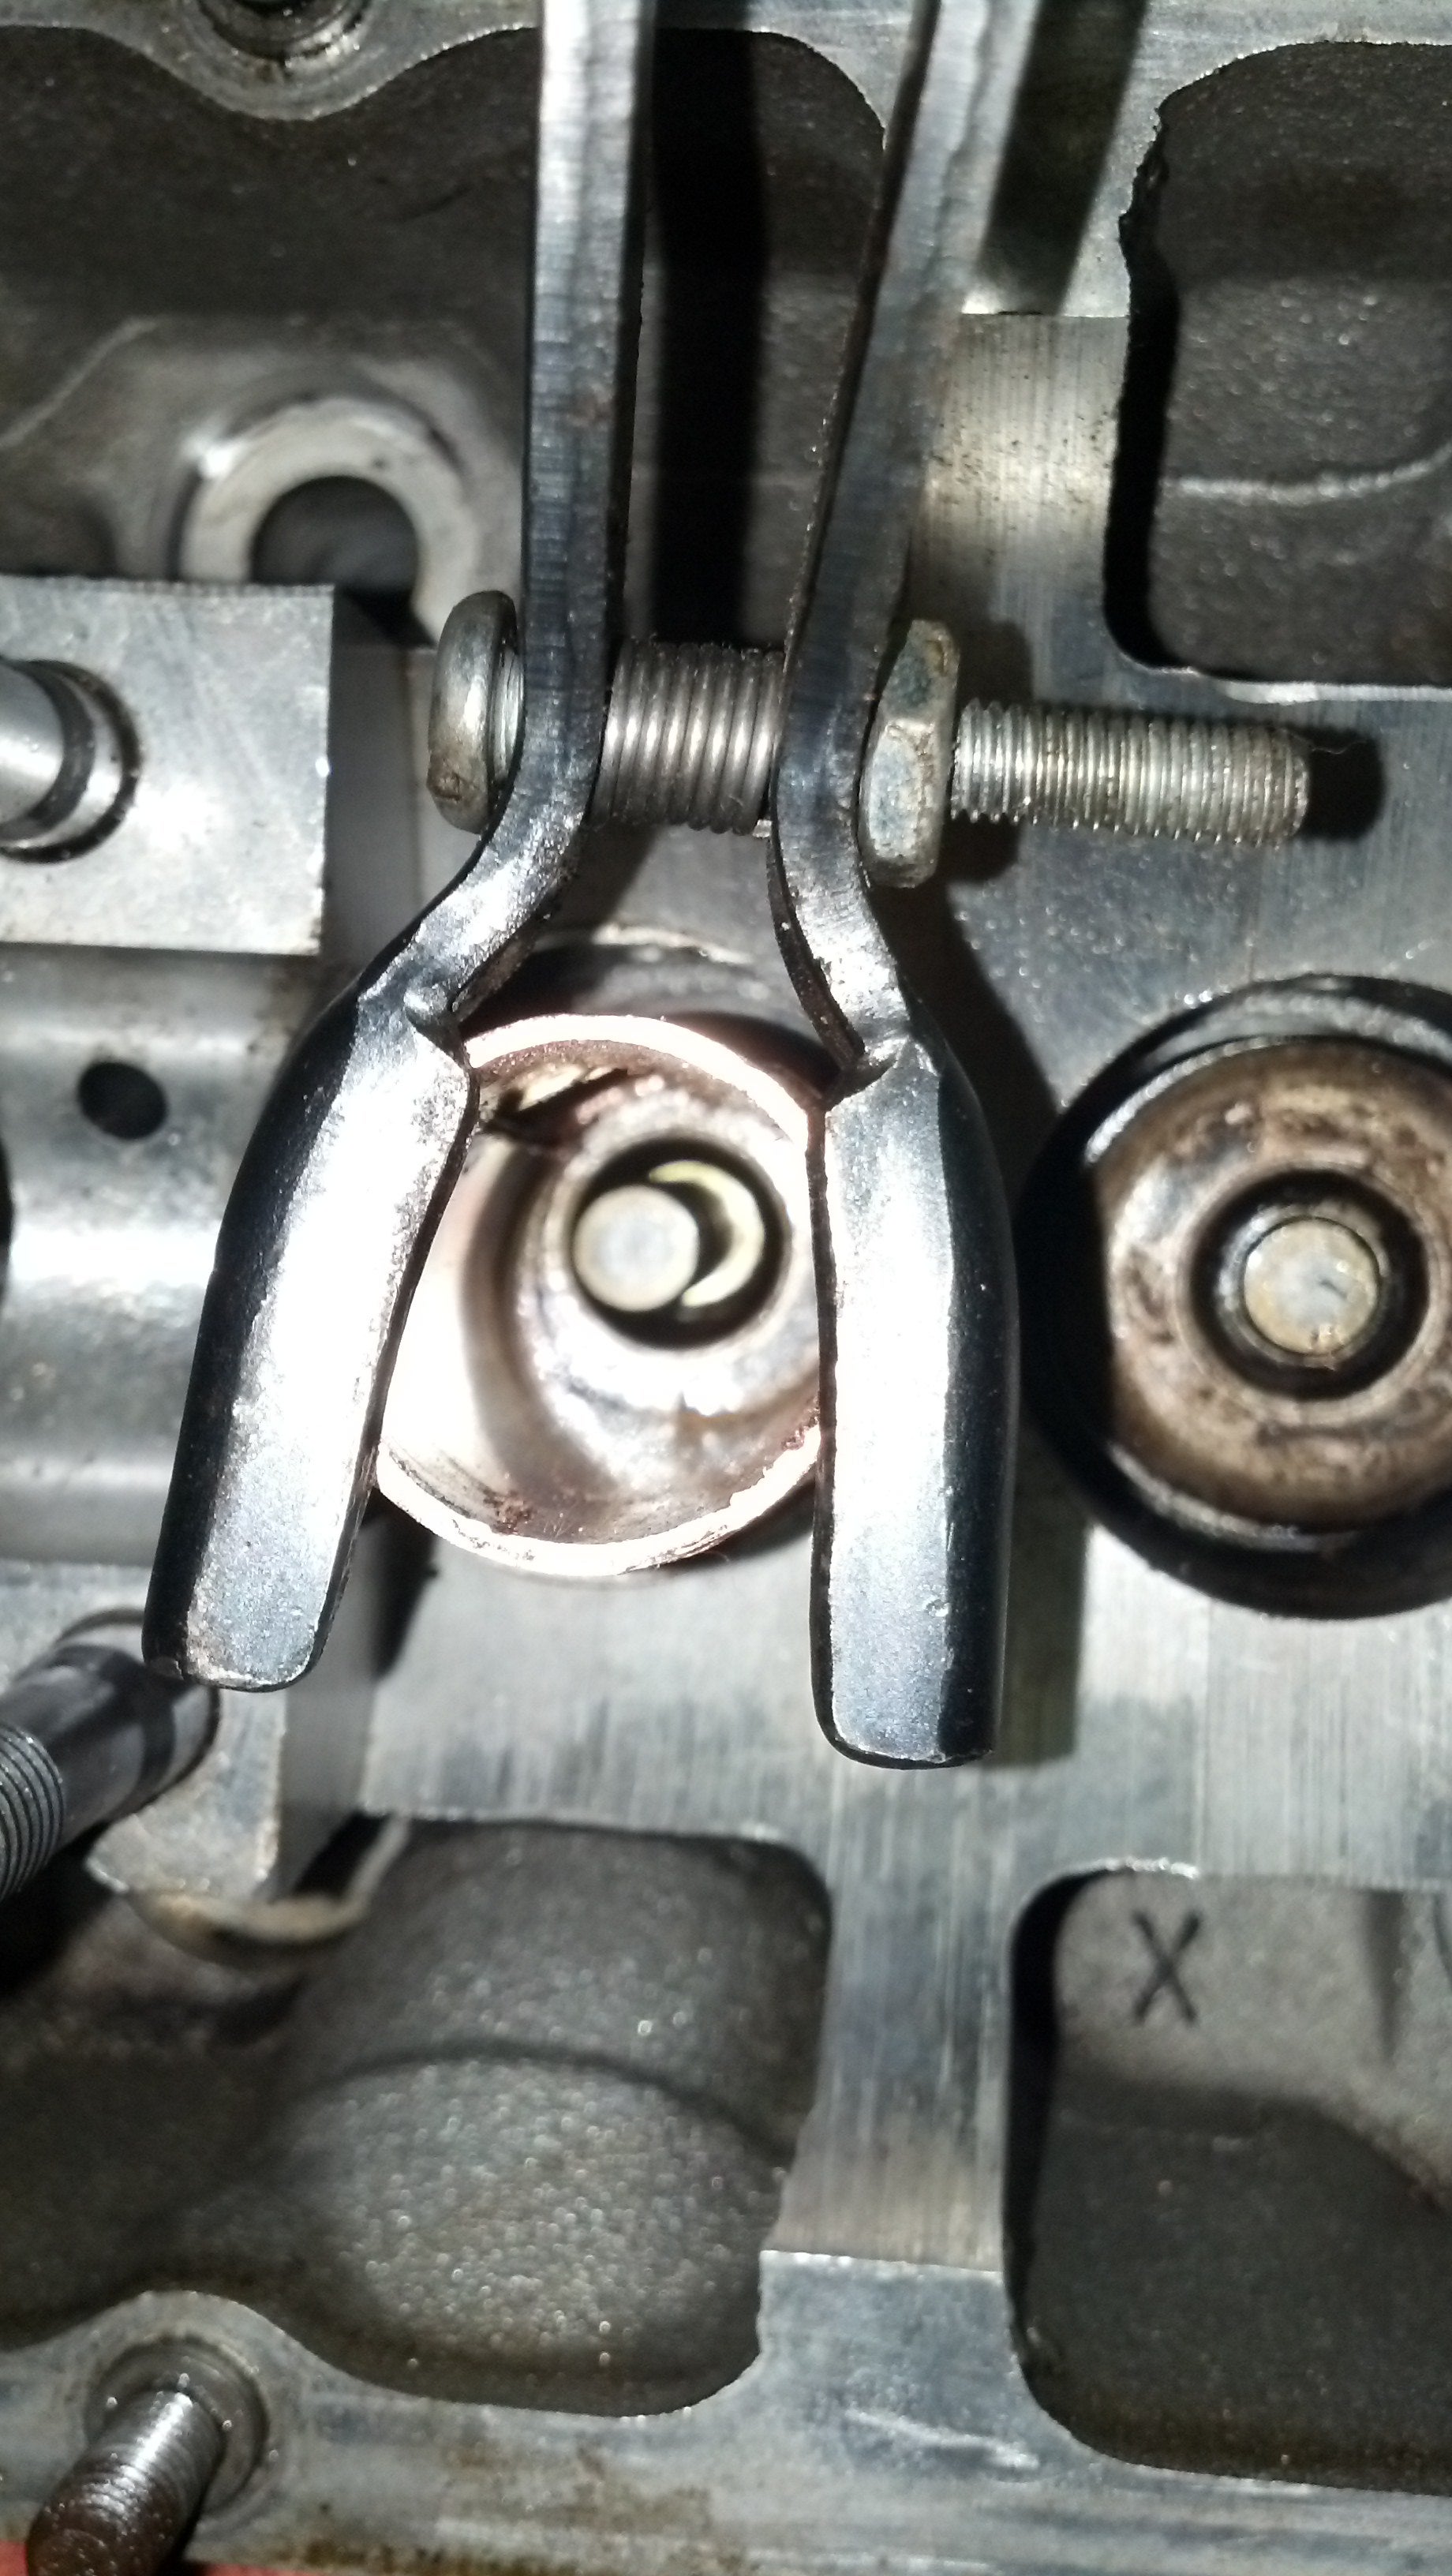
If you look closely, you will notice how little surface area is holding the right side of the pipe in place. This is mostly due to poor stamping practices that allowed the cups of the adapter to be sloped instead of flat. This was a concern of mine for the duration of the install. Luckily, no incidents! Rinse, lather, repeat and 9 valves later...
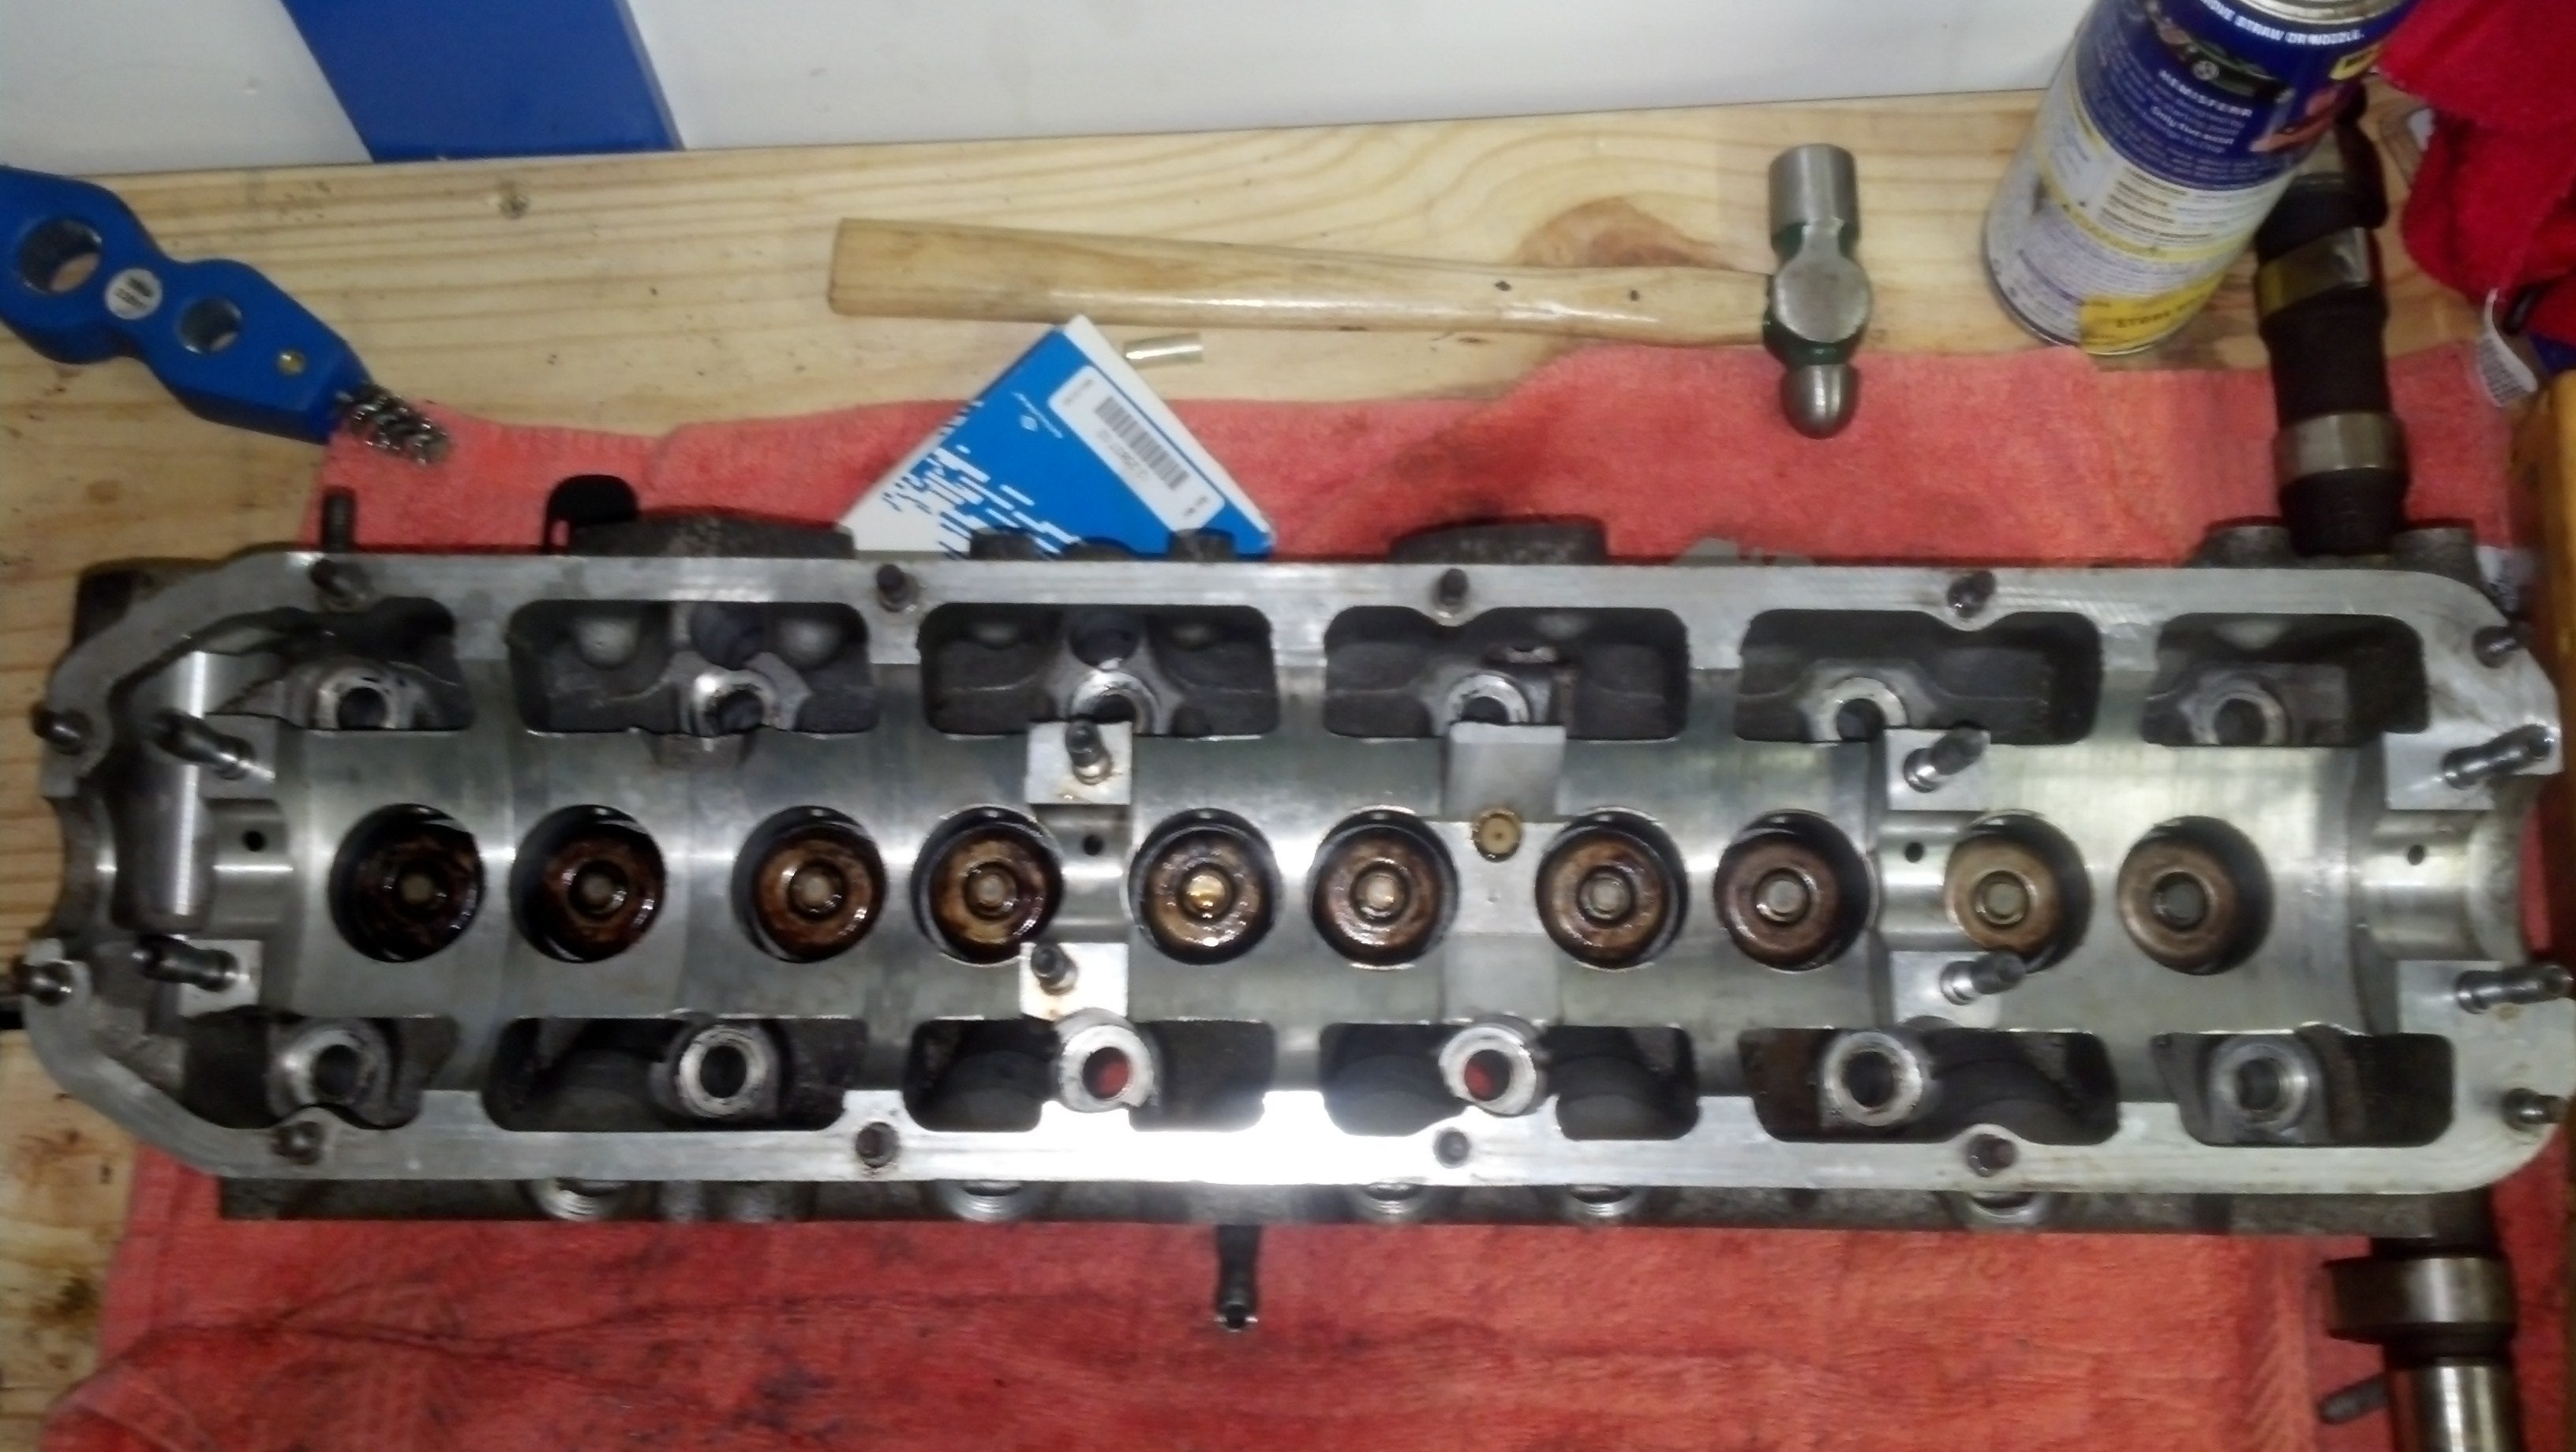
10 reasons to be thankful for life after attempting something stupid and coming out on top.
Show us the other side!

Tired of the steady drip drip drip of leaky valves? Try new and improved Lapping compound!!
Install the tappets...
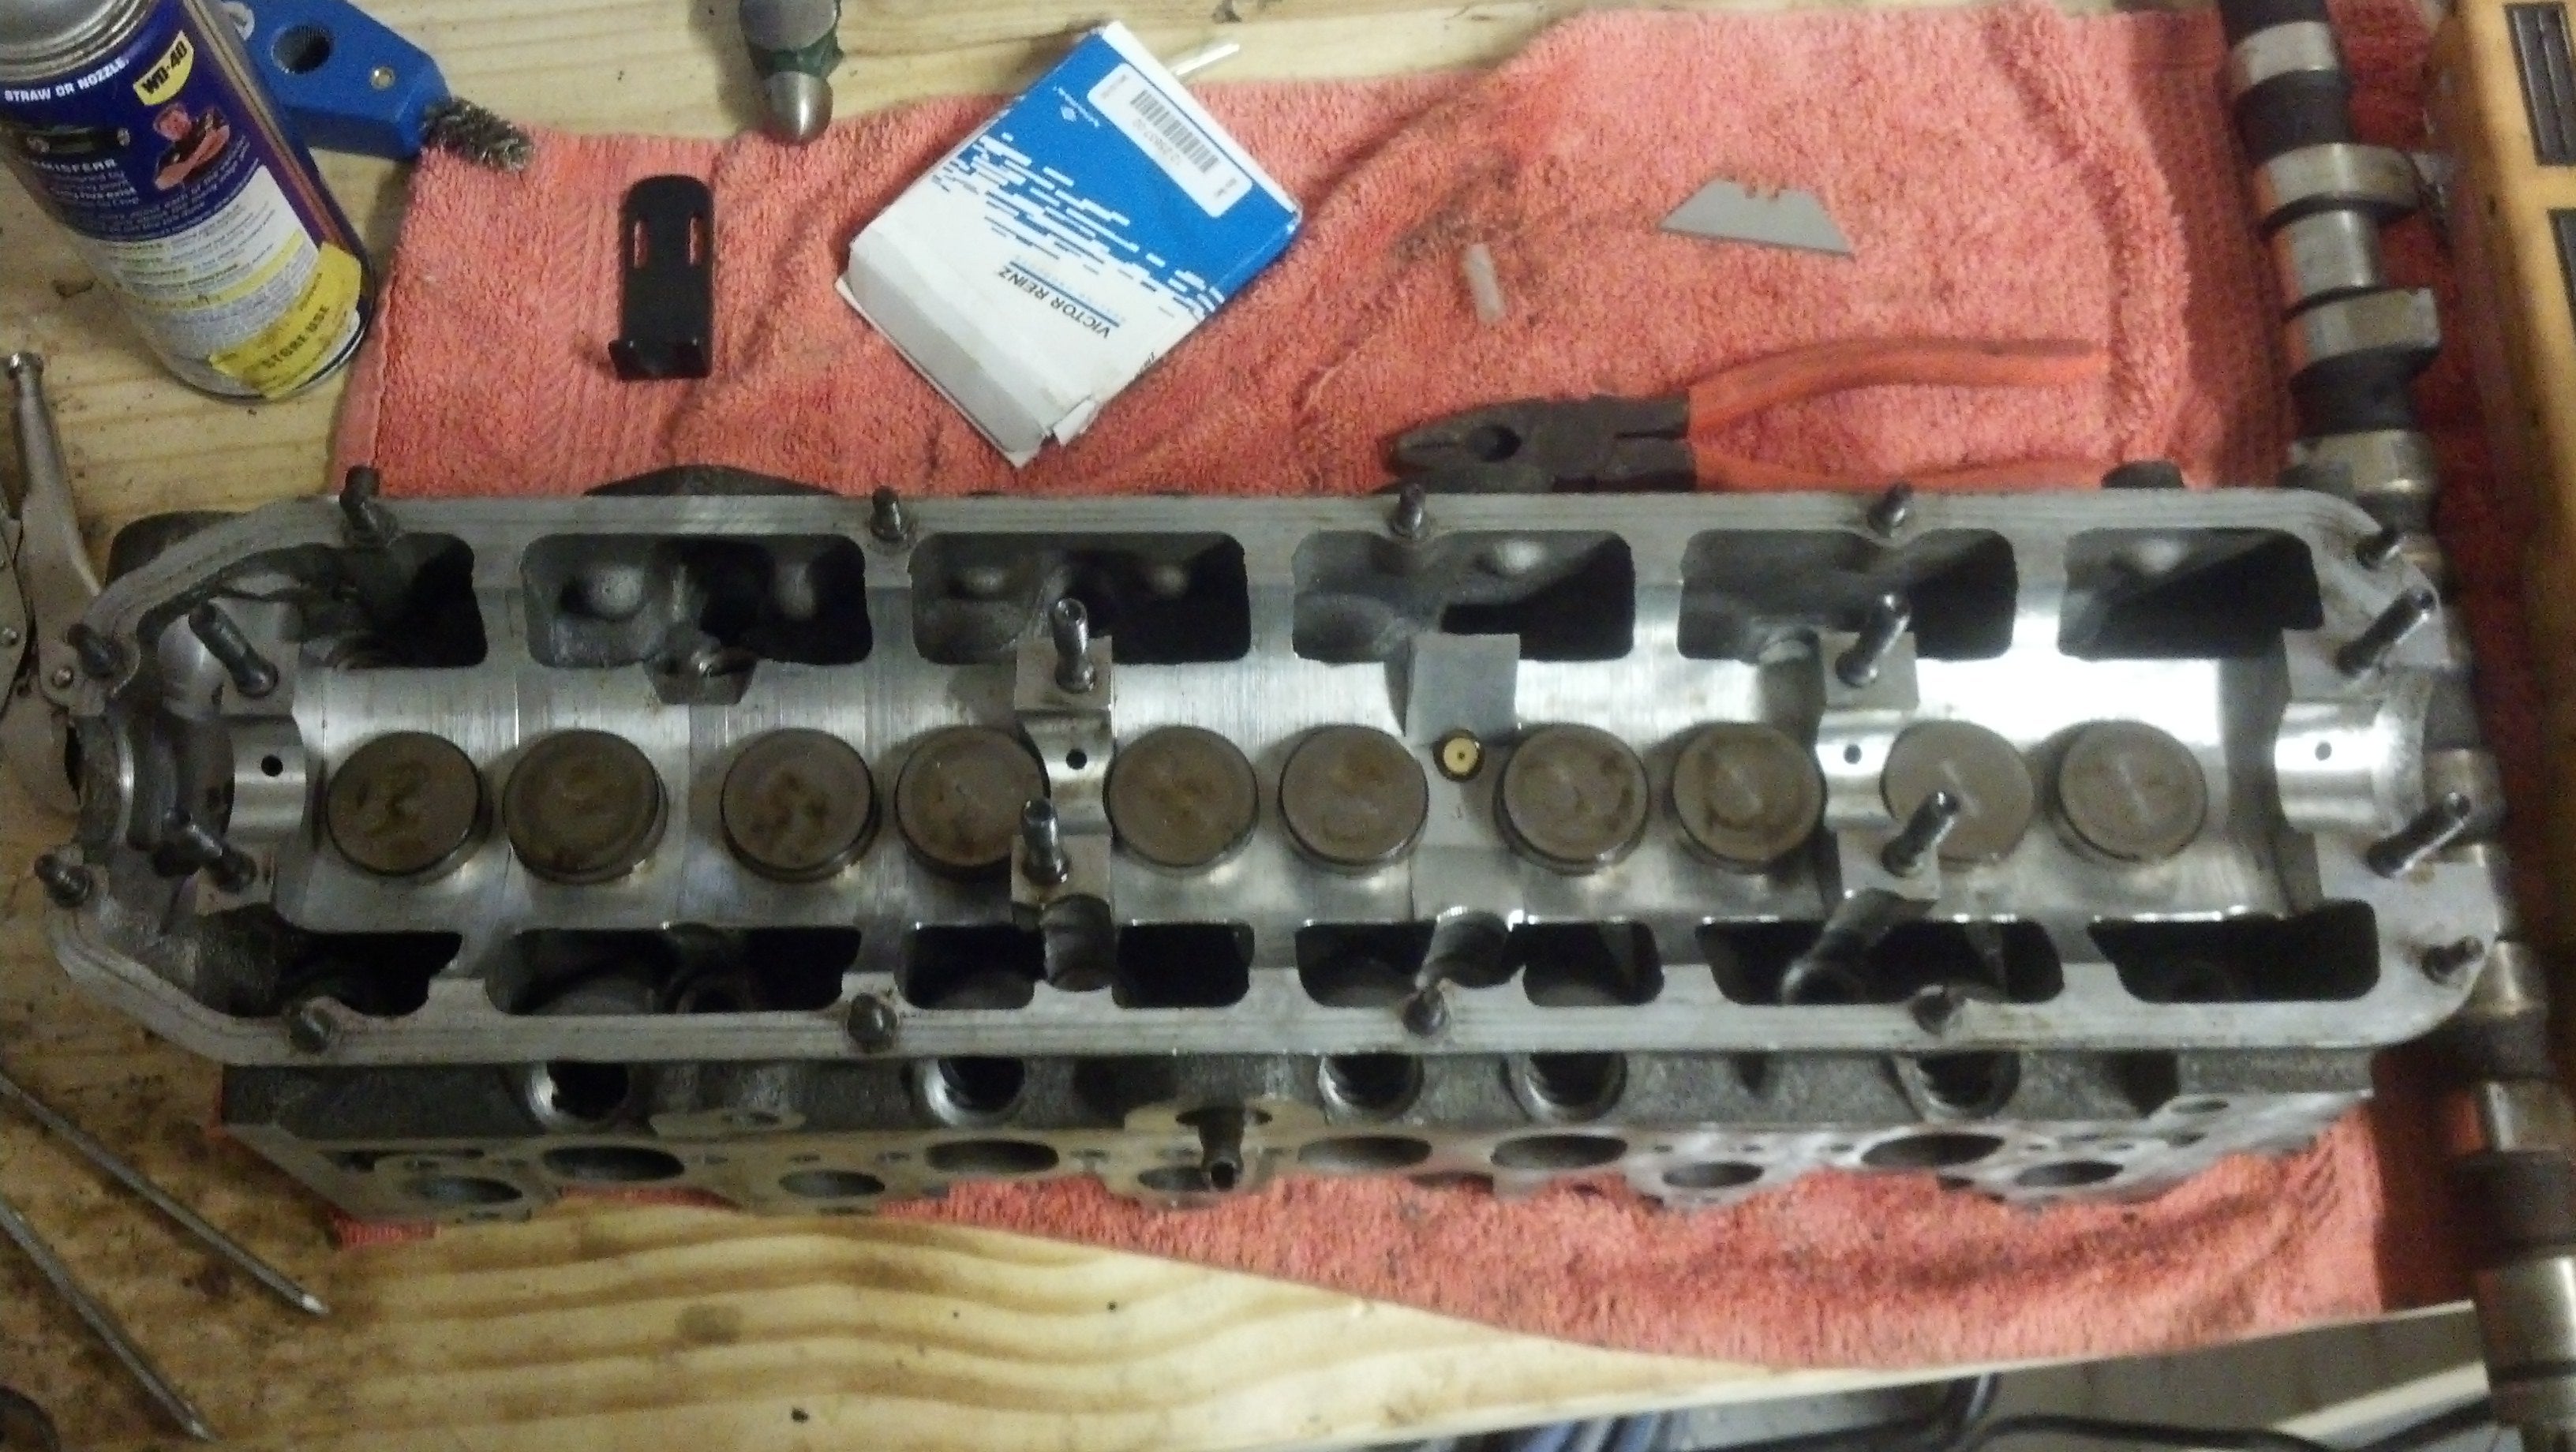
Tap, Tap, Taparoo
Mock up the cam...
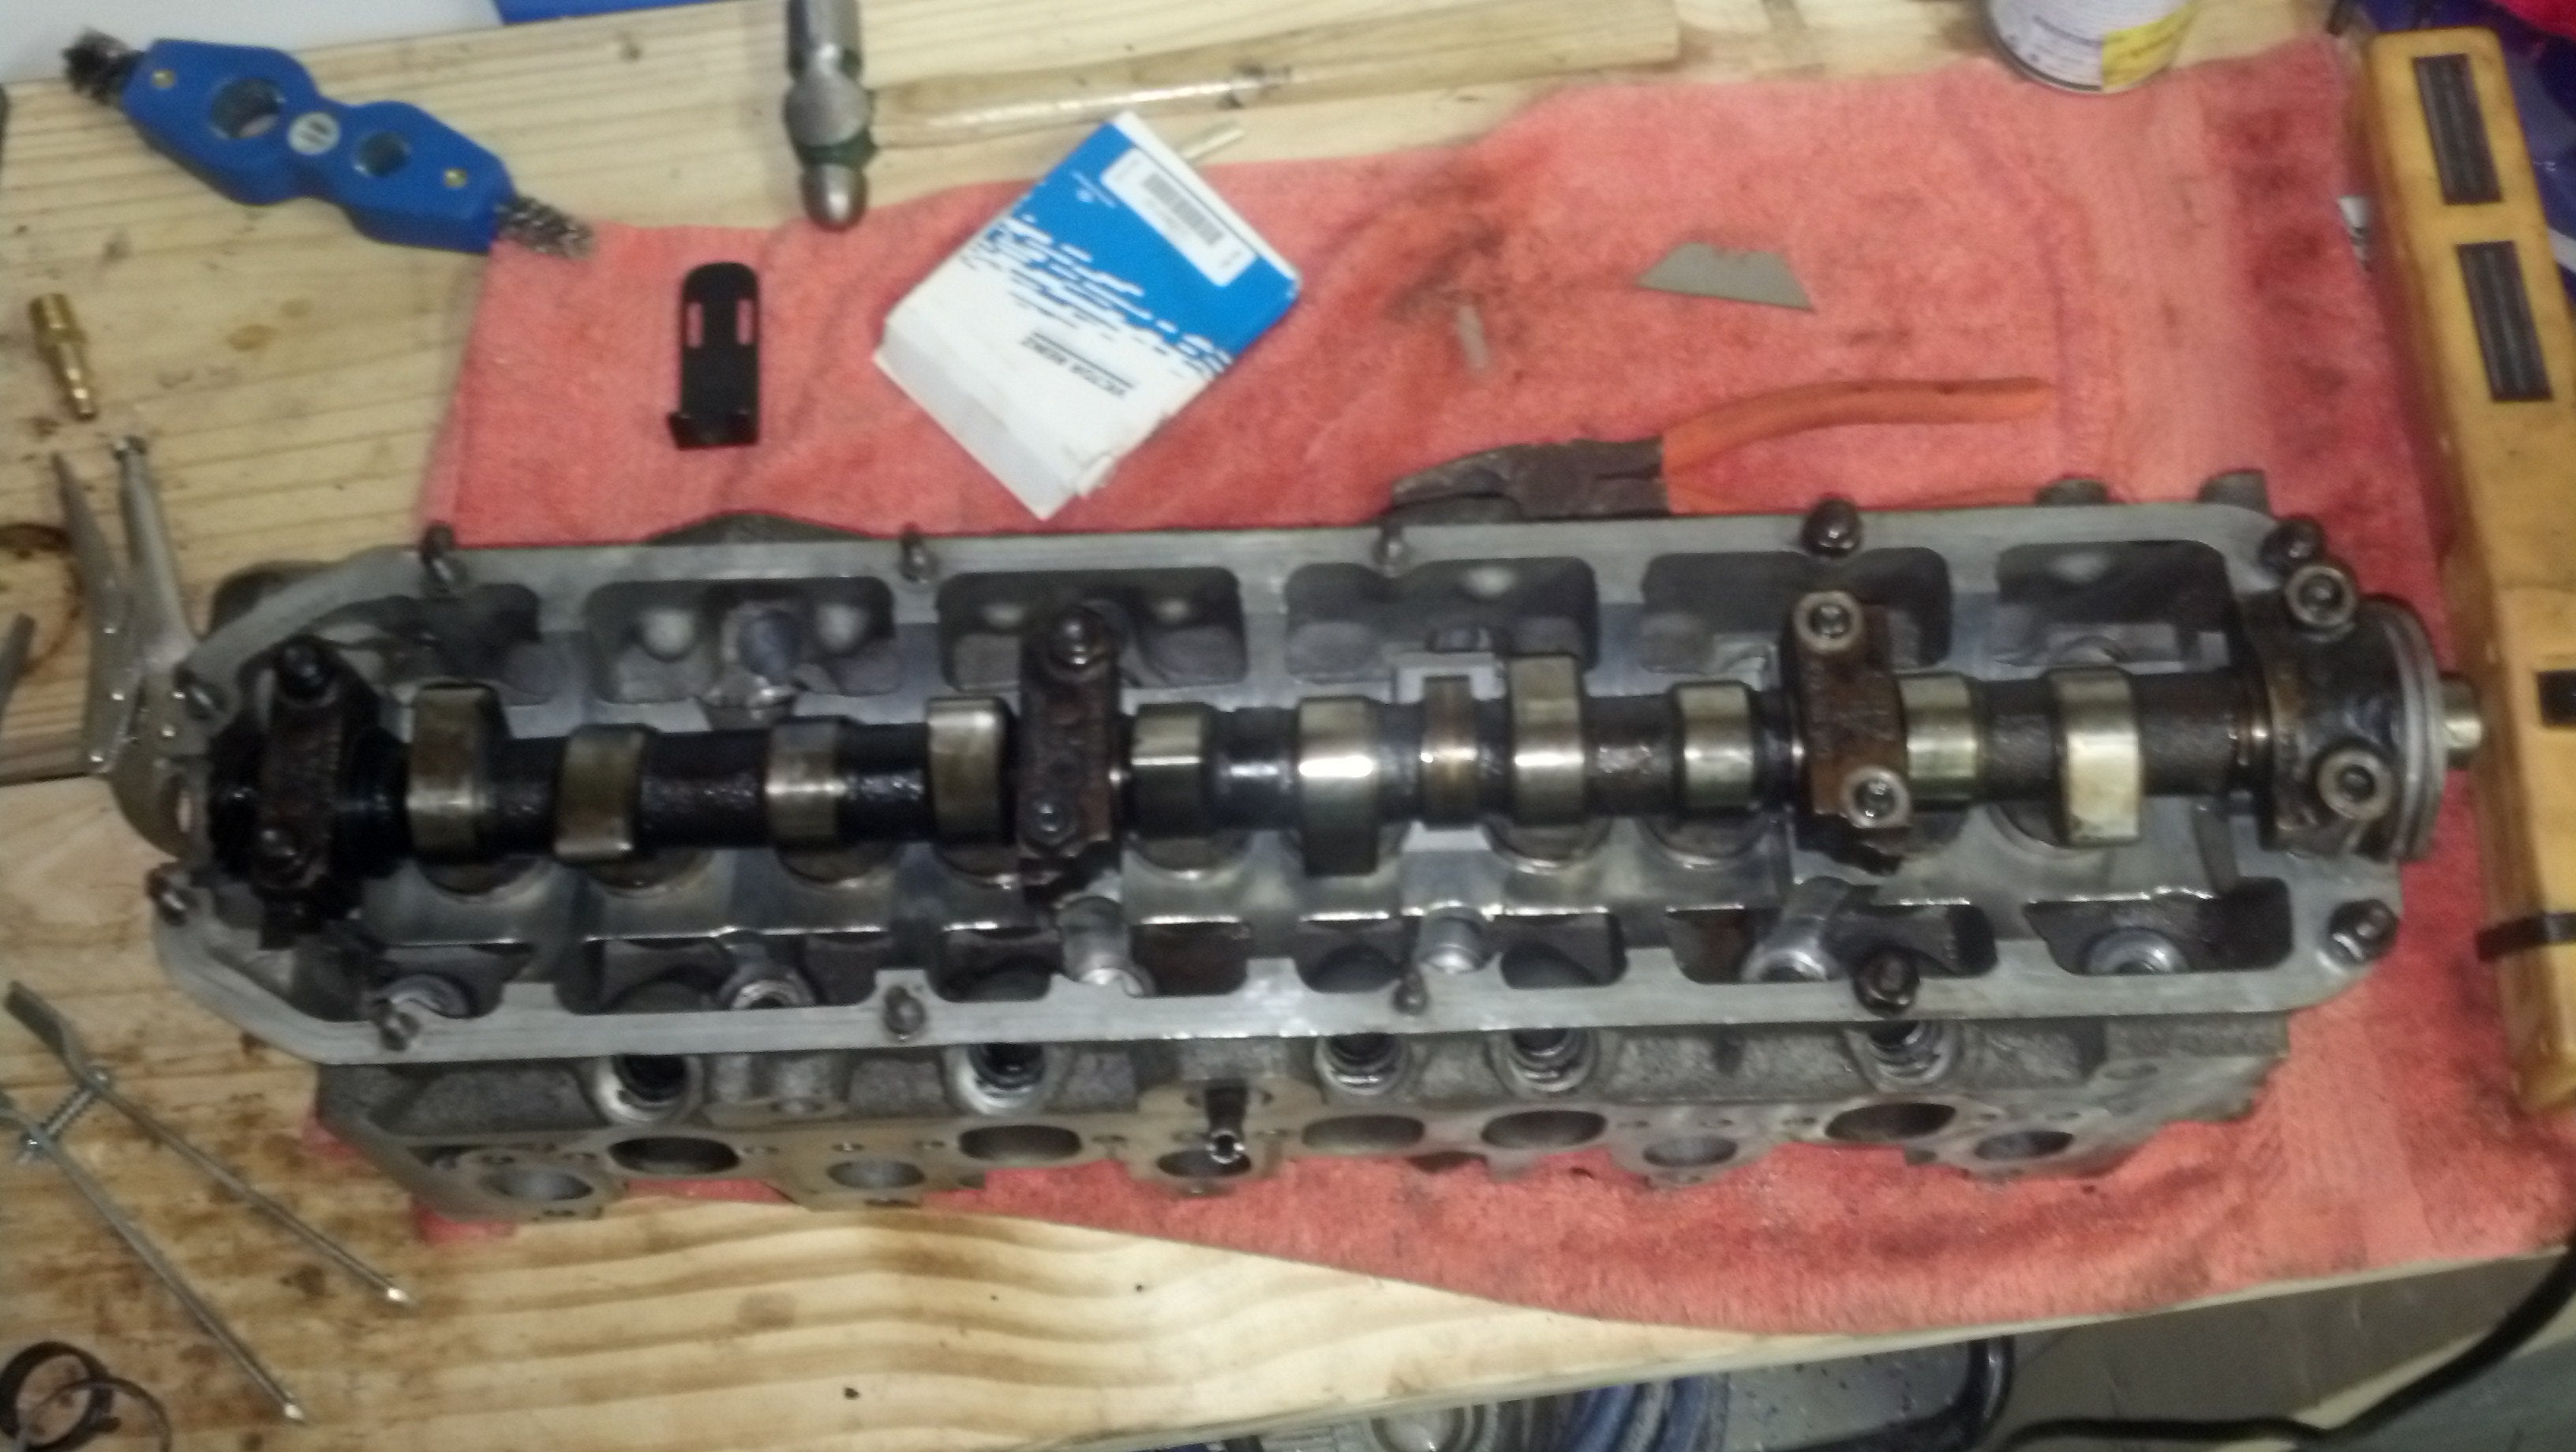
Next time: Cylinder head! AAAASSSSEEEEMMMMMBLLLLLEEEEEE!
Follow me on
!!!error: Indecipherable SUB-paragraph formatting!!!
, and
!!!error: Indecipherable SUB-paragraph formatting!!!
Audi 5k series: !!!error: Indecipherable SUB-paragraph formatting!!! , !!!error: Indecipherable SUB-paragraph formatting!!!